
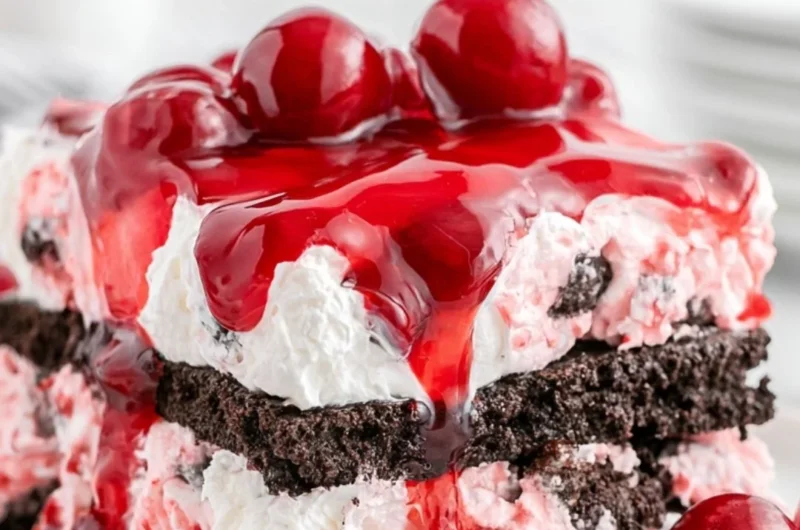
A Cozy Black Forest Icebox Cake Recipe to Delight Your Senses
There’s something undeniably magical about desserts that transport us back in time, isn’t there? As the weather cools and the leaves begin to turn, I find myself reminiscing about family gatherings filled with laughter, warmth, and, of course, mouthwatering treats. One of those cherished delights is the magnificent Black Forest Icebox Cake. It’s a dessert that whispers comfort, hugs the soul, and tantalizes the taste buds with every creamy, chocolatey bite! With layers of luscious whipped cream, velvety cream cheese and cherries, and the delightful crunch of Chocolate Oreo cookies, this no-bake gem is an absolute crowd-pleaser!
As the holidays approach, this easy and charmingly rustic dessert will make you the star of any gathering. This is one you’ll definitely want to pin for later!
Why You’ll Love This Recipe
- Quick and Simple: With just a handful of ingredients and no baking required, this recipe is incredibly easy to whip up. Perfect for those busy weeknights when you crave something sweet!
- Decadently Creamy: The combination of cream cheese and whipped cream creates a rich, creamy layer that perfectly complements the chocolatey Oreos and tart cherries.
- Beautiful Layers: Each slice reveals gorgeous layers, making this cake as visually stunning as it is delicious—ideal for sharing on Pinterest!
- Crowd-Pleasing Favorite: This Black Forest Icebox Cake is guaranteed to steal the hearts of your family and friends. It’s perfect for gatherings, potlucks, and holiday parties.
- Make-Ahead Delight: This dessert gets even better after a night in the fridge, allowing the flavors to meld into creamy perfection.
Ingredients You’ll Need for Black Forest Icebox Cake
Gather these simple ingredients to create your delightful dessert:
- 24 Chocolate Oreo cookies
- 8 oz Cream cheese, softened
- 1 cup Cherries, pitted and chopped
- 2 cups Whipped cream
- 1/2 cup Sugar
- 1 teaspoon Vanilla extract
How to Make Black Forest Icebox Cake
Let’s make it together! Follow these simple steps and enjoy the process of crafting this delightful treat:
- In a bowl, mix the cream cheese with sugar and vanilla until smooth and creamy.
- Gently fold in the chopped cherries, adding a burst of fruity flavor to your cream cheese mixture.
- In a serving dish, layer the Chocolate Oreo cookies at the bottom. Their crunch will be a delightful contrast to the creamy layers above.
- Spread a layer of the cream cheese and cherry mixture over the cookies, letting the flavors intertwine.
- Add a layer of whipped cream on top, creating a fluffy cloud over the cherry mixture.
- Repeat the layers until you run out of ingredients, finishing with a generous topping of whipped cream and some extra chopped cherries for that inviting final touch.
- Refrigerate for several hours or overnight before serving, letting the magic happen as the flavors blend beautifully.
Delicious Variations to Try
Why not put your own spin on this classic icebox cake? Here are some fun ways to customize it:
- Chocolate Lovers Dream: Swap the chopped cherries for rich chocolate shavings or even chocolate-covered cherries for an indulgent twist.
- Fruity Fun: Experiment with different fruits like strawberries, raspberries, or even zesty mandarin oranges to brighten up the layers.
- Nutty Crunch: Add crushed nuts like almonds or walnuts between layers for a satisfying crunch and extra flavor.
- Layered Surprise: Create additional layers of biscuits or swap the Oreos for another favorite cookie to surprise your taste buds!
Chef Emma’s Helpful Tips
Here are some tried-and-true tips from my kitchen to yours:
- Make-Ahead Advice: This icebox cake is perfect for prepping ahead of time. You can make it up to two days in advance and let it chill, allowing the flavors to deepen beautifully.
- Ingredient Swaps: If you’re in a bind, feel free to use low-fat cream cheese or a light whipped cream alternative without sacrificing too much decadence.
- Slicing Secrets: For neat slices, dip your knife in hot water and wipe it clean between cuts. This helps prevent sticking and leaves you with gorgeous pieces.
- Storage Suggestions: Keep leftover cake tightly covered in the refrigerator for up to three days. However, I doubt there will be much leftover since it’s so delicious!
What’s Inside – Nutrition Breakdown
Here’s the nutrition information per serving (assuming 8 servings):
- Serving Size: 1 slice
- Calories: 250
- Carbohydrates: 30g
- Sugar: 18g
- Fat: 13g
- Protein: 3g
- Sodium: 190mg
Frequently Asked Questions
Can I make this ahead?
Absolutely! It’s even better when made a day in advance.
Can I use different ingredients?
Yes! Feel free to customize with other fruits, cookies, or cream variations.
How do I store leftovers?
Keep any leftovers tightly covered in the refrigerator for up to three days.
How long does it last?
It’s best enjoyed within three days after making it, as the cookies soften over time.
A Cozy Closing Note
As we step into this welcoming season filled with warmth, love, and indulgence, this Black Forest Icebox Cake will surely become a beloved staple in your kitchen. Its rich layers and delightful flavors bring comfort on chilly days, reminding us of the sweet moments spent with family and friends. Save this Black Forest Icebox Cake to your dessert board so it’s ready when you need a cozy treat! Happy baking!