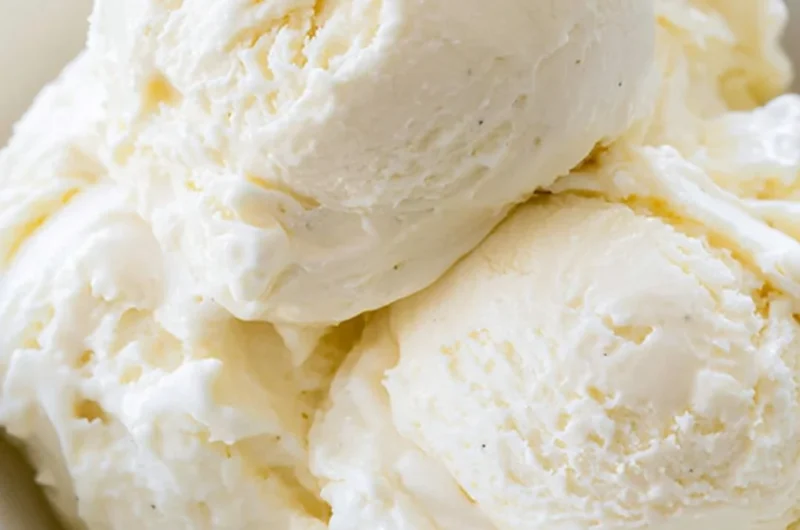
A Creamy, No-Churn Ice Cream Recipe to Savor
There’s something undeniably comforting about the taste of homemade ice cream. It brings back all those golden summer days spent with family, laughing and enjoying the sunshine. I remember sitting on our porch, the sweet scent of blooming flowers in the air, as my mom concocted batches of creamy delights in her trusty ice cream maker. Fast forward to today, and while I love a good ice cream maker, I’m here to tell you about the beauty of no-churn ice cream! This cozy treat is easier than pie, making it the perfect indulgence for any season. Trust me; this is one you’ll definitely want to pin for later!
Why You’ll Love This Recipe
- Quick and Easy: With just a few simple ingredients, you can whip up this ice cream in no time. It’s perfect for a spontaneous dessert!
- No Ice Cream Machine Needed: Who needs fancy equipment? This no-churn ice cream can be made right in your kitchen using basic tools.
- Family-Friendly Fun: Your little ones can join in, making this a memorable activity for the whole family to enjoy together.
- Customizable Flavors: Whether you’re in the mood for classic vanilla, a zesty lemon, or perhaps a rich chocolate, you can personalize this recipe to suit your taste.
- Perfect for Any Occasion: From cozy nights to festive gatherings, this creamy no-churn ice cream is the perfect dessert for any occasion!
Ingredients You’ll Need for No-Churn Ice Cream
Gathering a few easy ingredients is all you need to embark on this delightful ice cream journey! Here’s what you’ll need:
- 2 cups heavy cream
- 1 can sweetened condensed milk
- 1 teaspoon vanilla extract
- Pinch of salt
How to Make No-Churn Ice Cream
Let’s make this delicious no-churn ice cream together! Follow these simple steps to create a creamy dessert that’ll impress your loved ones:
- In a large bowl, whip the heavy cream using an electric mixer until stiff peaks form. Watch as it transforms into fluffy white clouds!
- In another bowl, combine the sweetened condensed milk, vanilla extract, and a pinch of salt. Stir until well blended—simple, right?
- Gently fold the whipped cream into the condensed milk mixture. Take your time; you want it to be light and airy.
- Pour the combination into a loaf pan and smooth the top. This is where the magic will happen!
- Cover the pan and freeze for at least 6 hours or until solid. Patience pays off here!
- Scoop out your delicious ice cream and enjoy! The moment you taste it, you’ll be transported to a cozy, joyful place.
Fun Ways to Customize It
While this no-churn ice cream shines in its classic vanilla form, the possibilities for flavoring are endless! Here are a few fun variations to try:
- Chocolate Delight: Add ½ cup of unsweetened cocoa powder to the sweetened condensed milk mixture for a rich and indulgent twist.
- Fruity Explosion: Mix in a cup of your favorite berries (fresh or frozen) for a refreshing summer treat! Blueberries, strawberries, or even mango will brighten up your ice cream.
- Rich Coffee Flavor: Blend in 2 tablespoons of instant coffee or espresso powder into the condensed milk mixture for a sophisticated coffee-flavored dessert.
- Nutty Goodness: Fold in ½ cup of crushed nuts (like almonds or pecans) for a fun crunch that brings in divine textures!
My Best Kitchen Secrets
To ensure you get the most out of your no-churn ice cream experience, here are some helpful tips:
- Make-Ahead Advice: This ice cream can be easily made days ahead! Just store it in the freezer, wrapped securely to avoid freezer burn.
- Don’t Rush the Mixing: Folding gently is key to keeping that airy texture. Take your time for the best results!
- Slicing Tricks: Use a warm knife to slice through the ice cream for clean, easy scoops. Just dip your knife in hot water, wipe it dry, and cut away!
- Storage Suggestions: If you have leftovers (a tough feat, I know!), store them in an airtight container to keep the ice cream fresh for up to two weeks.
What’s Inside – Nutrition Breakdown
Here’s a quick look at what you can expect nutritionally per serving (about ½ cup):
- Calories: 300
- Carbs: 25g
- Sugar: 24g
- Fat: 20g
- Protein: 3g
- Sodium: 80mg
Frequently Asked Questions
Can I make this ahead?
Absolutely! This ice cream keeps well in the freezer for up to two weeks.
Can I use different ingredients?
Yes! Feel free to experiment with different flavorings or mix-ins; the sky’s the limit!
How do I store leftovers?
Store your no-churn ice cream in an airtight container to keep it fresh and creamy.
How long does it last?
Properly stored, it will last up to two weeks in the freezer.
A Cozy Closing Note
This no-churn ice cream recipe holds a special place in my heart, not just for its creamy goodness, but also for the wonderful memories it creates. As you scoop your way through this sweet treat, I hope it brings you as much joy as it brings me. Whether it’s a quiet night on the couch or a festive gathering with friends, my no-churn ice cream is bound to warm your heart.
Save this No-Churn Ice Cream to your dessert ideas board so it’s ready when you need a cozy treat! Happy scooping!
Print
No-Churn Ice Cream
- Total Time: 375 minutes
- Yield: 4 servings 1x
- Diet: Vegetarian
Description
A comforting and creamy no-churn ice cream recipe that’s quick and easy to make, perfect for any occasion.
Ingredients
- 2 cups heavy cream
- 1 can sweetened condensed milk
- 1 teaspoon vanilla extract
- Pinch of salt
Instructions
- In a large bowl, whip the heavy cream using an electric mixer until stiff peaks form.
- In another bowl, combine the sweetened condensed milk, vanilla extract, and a pinch of salt. Stir until well blended.
- Gently fold the whipped cream into the condensed milk mixture.
- Pour the combination into a loaf pan and smooth the top.
- Cover the pan and freeze for at least 360 minutes or until solid.
- Scoop out your delicious ice cream and enjoy!
Notes
For different flavors, try adding cocoa powder, berries, coffee, or nuts.
- Prep Time: 15 minutes
- Cook Time: 0 minutes
- Category: Dessert
- Method: No-Churn
- Cuisine: American
Nutrition
- Serving Size: ½ cup
- Calories: 300
- Sugar: 24g
- Sodium: 80mg
- Fat: 20g
- Saturated Fat: 12g
- Unsaturated Fat: 8g
- Trans Fat: 0g
- Carbohydrates: 25g
- Fiber: 0g
- Protein: 3g
- Cholesterol: 100mg